Opening a term deposit account can be a straightforward process if you understand the necessary steps involved. This guide will walk you through the entire procedure, from depositing funds into a current account to managing your term deposit account effectively.
Understanding Term Deposits
A term deposit is a financial product offered by banks that allows customers to deposit a sum of money for a fixed period at a predetermined interest rate. The funds are typically locked in for the duration of the term, and early withdrawal may incur penalties.
Step 1: Deposit Funds into a Current Account
Before you can open a term deposit account, you need to have funds available in your current account. Here’s how to deposit funds:
- Access the Deposit Functionality: Navigate to the deposit section of your banking software.
- Select the Customer: Choose the customer account that will be making the deposit.
- Enter Deposit Amount: For example, if the customer wishes to deposit 50,000 USD, enter this amount.
- Add Description: Optionally, you can add a description for the transaction.
- Confirm the Deposit: Click the confirmation button to complete the deposit.
After completing these steps, you can verify that the funds are now available in the customer’s current account.
Step 2: Create a Term Deposit Account
Once the funds are available, you can proceed to open a term deposit account:
- Navigate to the Term Deposit Tab: Find the section in your banking software dedicated to term deposits.
- Create a New Term Deposit: Click on the option to create a new term deposit.
- Select the Term: Choose the duration for the term deposit. For instance, if the customer wants a 12-month term, select that option.
- Specify Details: Enter the creation date, interest rate, and any applicable fees (e.g., an early closure fee of 100 USD).
- Enter Initial Deposit Amount: Specify how much of the current account balance will be transferred to the term deposit account, such as 5,000 USD.
- Set the Open Date: Choose the date on which the term deposit will officially open.
- Save and Open the Account: Click the save button and then the open button to finalize the creation of the term deposit account.
Upon successful completion, the system will confirm that the term deposit account has been opened.
Step 3: Managing the Term Deposit Account
After opening the term deposit account, you can manage it through various functionalities:
- View Accounting Entries: Check the list of transactions associated with the term deposit account.
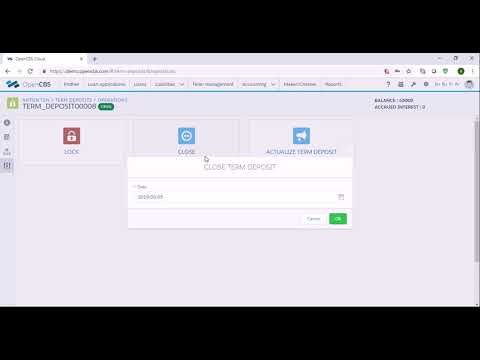
- Operations Tab: This section provides options to close the account, lock it, or actualize deposits.
- Close Account: If the customer decides to close the account before maturity, specify the closure date and confirm.
- Lock Account: This option suspends all operations on the account, useful if the customer is facing financial difficulties or sanctions.
- Actualize Deposits: This is necessary for term deposits created with past dates to ensure they are accounted for correctly before daily closure.
Step 4: Viewing Term Deposit Accounts
To view all term deposit accounts entered into the system:
- Navigate to the Liabilities Tab: Go to the section labeled liabilities.
- Select Term Deposits: Here, you will find a list of all term deposit accounts.
- Review Account Details: Each entry will show the account holder, account code, creation date, and status (open or in progress). You can click on an account to edit and view more details.
Conclusion
In this guide, we have covered the essential steps to open and manage a term deposit account using banking software. By following these instructions, you can ensure a smooth process for both the customer and the financial institution. Understanding these operations will help you effectively manage term deposits and provide better service to clients. Thank you for your attention.