Setting up your mountain bike suspension correctly is crucial for optimal performance, control, and comfort on the trail. With numerous knobs, dials, and valves, it can be overwhelming to know where to start. This comprehensive guide will take you through the essential steps to set your suspension in just 10 minutes, focusing on sag, rebound damping, compression damping, volume spacers, and maintenance tips.
1. Setting the Sag
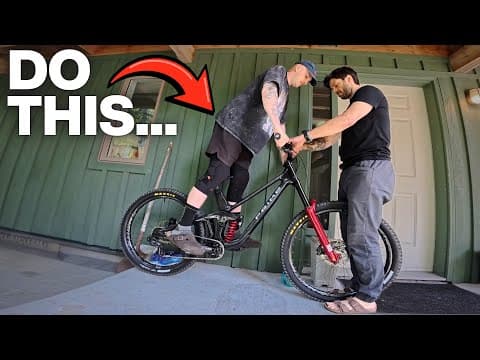
The first and most important step in suspension setup is adjusting the sag. Sag refers to how much your suspension compresses under the combined weight of the rider and the bike. Ideally, you want to achieve 25 to 30% sag on both the fork and the shock.
Why is sag important?
- It keeps your wheels in contact with the ground, allowing them to extend into holes and absorb drops.
- It enables the suspension to compress properly, maintaining traction and control.
If your sag is not set correctly, your wheels may lose contact with the ground, reducing traction and control.
Note: If your bike's sag is already set, you can skip this step. For a detailed sag setup guide, refer to specialized resources.
2. Adjusting Rebound Damping
Rebound damping controls the speed at which your suspension recovers after compressing from a bump. Getting this setting right is safety-critical.
Why Rebound Damping Matters
- If rebound is too fast, the suspension can push against your arms or cause the rear of the bike to buck, potentially lifting the wheel off the ground and reducing control.
- If rebound is too slow, the suspension won't return to the sag point quickly enough, causing it to pack down progressively, making the bike stiffer and harder to control.
How to Adjust Rebound Damping
- Use the rebound knob on your fork and rear shock. Typically, one direction slows the rebound (towards the tortoise), and the other speeds it up (towards the jackalope).
- Test the feel:
- Too fast rebound feels like a pogo stick, pushing hard into your body.
- Too slow rebound feels heavy and unresponsive, making the front end feel sluggish.
Top Tip
The firmer your spring rate, the more rebound damping you need to control the stronger spring force. Conversely, lighter springs require less rebound damping.
Advanced Suspension
High-end bikes may have separate low-speed and high-speed rebound adjustments:
- Low-speed rebound controls suspension movement during slow inputs like braking or cornering.
- High-speed rebound manages the suspension's reaction to fast, high-frequency hits like breaking bumps.
Aim for a controlled but quick return to the sag point without the bike pushing or bucking you.
3. Setting Compression Damping
Compression damping controls how quickly your suspension compresses under load, providing resistance alongside the spring.
Basic Compression Settings
Many suspensions have a dial with settings like Open, Pedal, and Firm:
- Open: Factory default, allowing maximum compression.
- Pedal: Adds a light threshold to help maintain a platform while pedaling.
- Firm: Maximizes compression damping for uphill efficiency but may be too stiff for downhill.
Advanced Compression Adjustments
High-end forks and shocks may allow separate adjustments for low-speed and high-speed compression:
- Low-speed compression affects how the bike handles slow inputs like riding over rises, compressions, or berms. It should allow the suspension to sink gradually and maintain bike shape.
- High-speed compression deals with fast impacts deep in the suspension stroke, such as breaking bumps. It should be open enough to absorb hits but firm enough to prevent bottoming out.
Signs of Incorrect Compression Settings
- Too fast high-speed compression causes the suspension to crash through travel, feeling unsupportive.
- Too much high-speed compression leads to harshness, arm pump, and skipping over bumps.
4. Balancing Front and Rear Suspension
For full suspension bikes, it’s essential to set up the front and rear suspension together to maintain balanced handling.
Why Balance Matters
- Imbalanced suspension can cause the bike to pitch forward or backward, leading to strange handling and reduced control.
- Balanced suspension ensures the bike’s dynamic geometry works as intended, providing predictable and stable handling.
How to Check Balance
- Bounce on the bike and observe if the front and rear compress and extend at roughly the same rate.
- If one end feels stiffer or softer, adjust accordingly to achieve harmony.
5. Using Volume Spacers
Volume spacers are small inserts placed inside the air chamber of your suspension to adjust the air volume.
What Volume Spacers Do
- They reduce the air chamber size, increasing air pressure more quickly as the suspension compresses.
- This makes the suspension firmer towards the end of the travel, preventing bottoming out.
How to Install Volume Spacers
- Release all air from the suspension.
- Remove the top cap or air can from your fork or shock.
- Thread the volume spacers onto the bottom of the top cap.
- Reinstall the top cap and re-inflate the suspension.
Important Notes
- Always check the manufacturer’s guidelines for the maximum number of volume spacers allowed.
- Too many spacers make the suspension harsh and overly progressive, preventing full travel.
- Too few spacers may cause frequent bottoming out despite correct sag and compression settings.
6. Maintenance Tips
Proper maintenance is key to suspension performance:
- New bikes usually come with well-maintained suspension.
- If your suspension feels stiff, sticky, or not performing as expected, consider servicing it.
- Follow the manufacturer’s recommended service intervals to keep your suspension working at its best.
Conclusion
Setting up your mountain bike suspension doesn’t have to be complicated or time-consuming. By focusing on sag, rebound and compression damping, balancing front and rear suspension, and using volume spacers wisely, you can significantly improve your bike’s handling and comfort. Remember to maintain your suspension regularly to ensure consistent performance on every ride.
Happy riding!