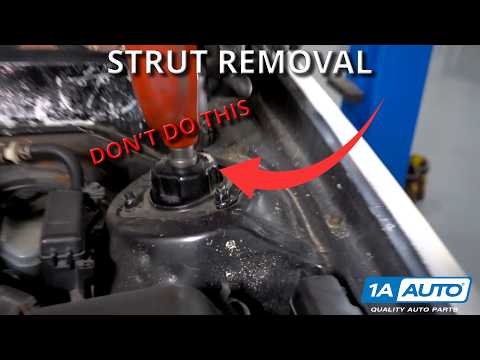
This blog post discusses the most common mistakes made during front strut installation, emphasizing safety, proper techniques, and the importance of using the right tools to avoid costly damages and ensure vehicle stability.
Installing front struts on a vehicle can be a challenging task, and mistakes can lead to dangerous situations and costly repairs. In this post, we will explore some of the most common mistakes made during strut installation and how to avoid them.
Before diving into the installation process, it is crucial to prioritize safety. Always wear safety glasses and ensure that you are focused on the task at hand. Distractions can lead to accidents, as demonstrated by a recent experience where a moment of inattention led to potential hazards.
When lifting your vehicle, it is essential to place the jack or stands in the right locations. Avoid placing them under the control arm, oil pan, or exhaust. Instead, use solid areas like the subframe or pinch rail for support. This ensures stability and prevents any upward pressure on the control arm during strut replacement.
One common mistake is attempting to heat bolts to loosen them. This can be particularly dangerous if brake hoses or ABS wires are still connected, as heating can cause damage or even explosions in gas-filled struts. Instead, consider using penetrating oil or proper tools to loosen stubborn bolts without risking safety.
When replacing struts, the sway bar link is often attached. If the nut does not come off easily, avoid using locking pliers or heating methods, as this can damage the sway bar link and lead to additional costs. Instead, look for an Allen head in the middle of the stud to hold it in place while removing the nut.
While working on the strut, be cautious not to pull on the CV joint or brake hoses. Removing the axle nut first and ensuring that all mounting points for brake hoses and ABS wires are disconnected will provide the necessary slack and prevent damage.
When removing bolts that hold the knuckle to the strut, pay attention to their orientation. Bolts should be reinstalled in the same direction to avoid alignment issues. If you encounter alignment adjustment bolts, which are typically oblong, ensure they go back into the same holes to maintain proper vehicle alignment.
One of the most hazardous aspects of strut installation is dealing with the spring. If the spring is not properly compressed, it can shoot apart when the center nut is removed, posing a serious risk of injury. Always use a proper spring compressor and ensure it is securely in place before attempting to disassemble the strut.
When replacing struts, consider whether to replace just the strut or the entire assembly. While it may seem cost-effective to replace only the strut or spring, a complete strut assembly can save time and effort. Additionally, replacing both struts at the same time ensures balanced handling and stability.
During reassembly, ensure that the spring is correctly aligned with the strut. Tightening the strut nut too much can damage the bearings inside the strut cap, leading to noise and potential failure. Use a torque wrench to tighten all components to manufacturer specifications.
After reassembling the strut, it is crucial to perform a four-wheel alignment. Any front-end work, including strut replacement, can affect vehicle alignment, leading to handling issues. Additionally, consider replacing rear shocks simultaneously to maintain balanced performance.
In summary, avoiding common mistakes during front strut installation is essential for safety and vehicle performance. By following proper techniques, using the right tools, and ensuring thorough checks, you can successfully complete the installation without incurring additional costs or risks. If you have any experiences or tips regarding strut installation, feel free to share them in the comments below.