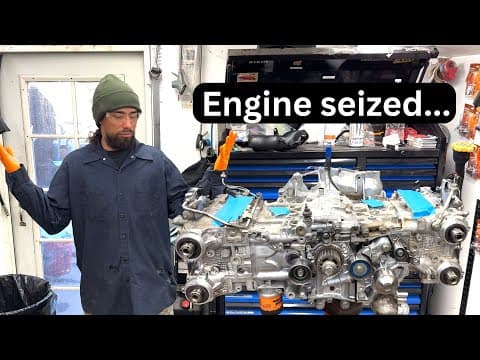
This blog post details the comprehensive rebuild of a Subaru EJ255 engine for a Forester XT, highlighting the challenges faced, the diagnostic process, and the steps taken to restore the engine to working condition for just $500.
When I purchased a 2009 Subaru Forester, I was informed that it only needed a new turbo. However, anyone familiar with automotive repairs knows that issues rarely stem from just one component. This post chronicles my experience in diagnosing and rebuilding the EJ255 engine, aiming to get this vehicle back on the road without breaking the bank.
Upon acquiring the Forester, I suspected that the engine had cracked ringlands. After installing a new turbo, the engine continued to smoke, confirming my fears. With the goal of removing the engine and replacing the pistons, I prepared for a thorough rebuild.
Before diving into the rebuild, I needed to remove the engine from the vehicle. I had previously created a detailed how-to video on removing a Subaru motor, which I referenced for this process. Key steps included:
Once the engine was out, I placed it on a stand to begin the disassembly process.
As I disassembled the engine, I focused on stripping it down to a bare long block. This involved removing various components such as the timing covers, intake, and oil pan. During this process, I discovered that the front main seal had been pushed out, likely due to positive crankcase ventilation issues.
After removing the heads, I checked the valve adjustments and found them to be within acceptable ranges. However, I noted that the exhaust valves were discolored, indicating potential issues with oil consumption. I suspected that cylinder number one might have broken ringlands, but further inspection revealed that the ringlands were intact.
Given the engine's history of turbo failures, I decided to split the block to inspect the bearings. This was a crucial step, as I wanted to ensure that the engine could be rebuilt without future issues. Upon inspection, I found significant wear on the bearings, indicating that the engine had indeed suffered from severe stress.
After extensive inspection, I concluded that the primary issue was a faulty PCV valve, which had allowed excessive pressure to build up in the crankcase. This pressure likely caused oil to seep past the valve seals, leading to the smoking issue I had observed. I also noted that the turbo had introduced metal shavings into the engine, further complicating the rebuild.
With the diagnosis complete, I set out to rebuild the engine. This involved:
I opted for a low-budget approach, using aftermarket parts where possible to keep costs down. The entire rebuild process took several days, during which I faced various challenges, including sourcing parts and ensuring everything was cleaned and reassembled correctly.
After completing the rebuild, I reassembled the engine and prepared to install it back into the Forester. I was eager to see if my efforts would pay off. Once everything was in place, I performed a test run. Initially, the engine exhibited some piston slap, a common issue in Subaru engines due to their design. However, I was optimistic that this would resolve itself as the engine broke in.
After driving the Forester for about 100 miles post-rebuild, I was pleased to find that the engine was running well, despite some residual smoking from oil in the exhaust. This rebuild, completed for around $500, was a testament to perseverance and resourcefulness in automotive repair.
In summary, while I initially misdiagnosed the issue as broken ringlands, the real culprit was a faulty PCV valve and the aftermath of previous turbo failures. This experience reinforced the importance of thorough diagnostics and the value of hands-on experience in automotive repair.