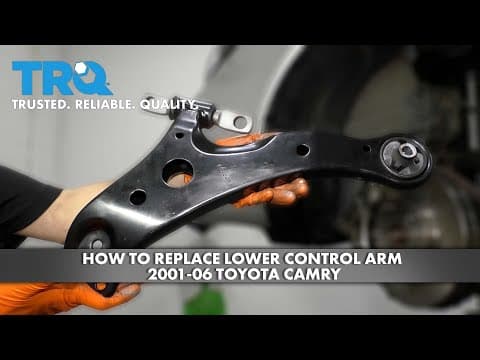
Replacing the lower control arm on a 2001-06 Toyota Camry can seem daunting, but with the right tools and a clear step-by-step process, it can be accomplished effectively. This guide will walk you through the entire procedure, ensuring you have all the necessary information to complete the task successfully.
- 21mm socket
- 17mm socket
- 18mm socket
- 19mm socket
- 22mm socket
- Pry bar
- Wrench
- Pole jack
- Torque wrench
- Hammer
- Replacement lower control arm
- New bushings and spacers (if necessary)
Step 1: Remove the Wheel
- If your Camry has steel wheels with hubcaps, use a pry bar or screwdriver to gently pry off the hubcap. Be careful not to crack or break it.
- Using a 21mm socket, remove all five lug nuts and take off the wheel.
Step 2: Disconnect the Control Arm
- Remove the bolt and two nuts connecting the control arm. The factory size is 17mm, but you may find variations (18mm or 19mm).
- Use a pry bar to pry the control arm down, separating it from the ball joint. Spin the ball joint to keep it out of the way.
Step 3: Remove the Engine Mount
- To access one of the bolts for the control arm, you need to remove the engine mount on this side. Start by removing the two caps to expose the nuts.
- Using a 17mm socket, remove all three nuts from the engine mount.
- With a pole jack, gently lift the engine and transmission to clear the studs from the subframe. Avoid jacking on the oil pan or transmission pan.
- Loosen the top nut with a 19mm socket but do not remove it completely yet.
Step 4: Remove the Control Arm
- Continue lifting the engine until the studs are clear. You may need to use a wrench to remove the bolt that is now accessible.
- Once loose, unthread the bolt completely while holding the motor mount out of the way.
- Use a long pry bar to pry out the rear bushing of the control arm. Twist and maneuver the control arm to remove it completely.
Step 5: Install the New Control Arm
- Begin by lining up the rear bushing of the new control arm first. Do not secure it yet; keep it loose.
- Slide the front of the control arm into place, ensuring the spacer is positioned correctly.
- Use a pry bar to help align the front bolt and hammer it into place until it reaches the threads.
- Secure the rear bushing first, then proceed to install the front bolt. Ensure both bolts are started but not tightened completely yet.
Step 6: Tighten the Bolts
- Use a ratcheting wrench to tighten the bolts as much as possible. The torque specifications are:
- Front bolts: 148 foot-pounds
- Rear bolt: 152 foot-pounds
- Tighten the bolts by hand as much as possible, and then use a torque wrench to achieve the specified torque.
Step 7: Reinstall the Engine Mount
- Lower the engine back down, ensuring the engine mount studs align with their holes.
- Reinstall the three nuts on the engine mount and torque them to 64 foot-pounds.
- Replace the plastic caps to protect the threads from debris.
Step 8: Reassemble the Suspension
- Use a pry bar to align the control arm with the ball joint and start the nuts and bolt for the ball joint.
- Torque the ball joint nuts and bolt to 55 foot-pounds.
- Reinstall the tie rod end, securing it with the castle nut and torqueing it to 36 foot-pounds.
- Reattach the axle nut, initially using an air gun to get it close, then torque it to 217 foot-pounds.
Step 9: Final Steps
- Reinstall the wheel, starting all five lug nuts and torqueing them to 76 foot-pounds.
- Ensure the hubcap is correctly aligned with the valve stem before securing it.
- Finally, take the vehicle for a road test to ensure everything is functioning properly.
By following these steps, you can successfully replace the lower control arm on your 2001-06 Toyota Camry, ensuring a smoother ride and better handling. Always remember to double-check your work and adhere to the specified torque settings for safety and performance.