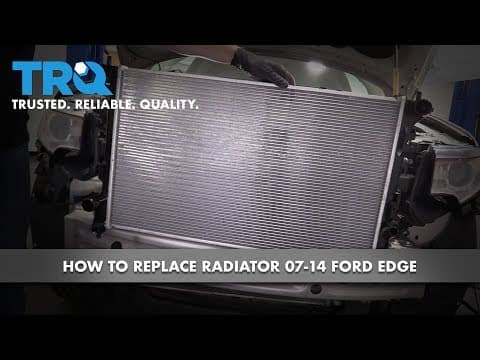
Replacing the radiator in your 2007-2014 Ford Edge can seem daunting, but with the right tools and a clear step-by-step process, it can be accomplished efficiently. This guide will walk you through each step, ensuring you have all the information needed to complete the task successfully.
- 19mm wrench or ratchet
- 8mm socket
- 10mm socket
- Philips head screwdriver
- Flathead screwdriver
- Catch bucket for coolant
- New radiator
- New hose clamps (if necessary)
- Manufacturer-specified coolant
Step 1: Prepare the Vehicle
- Open the Hood: Start by opening the hood of your Ford Edge and removing the radiator cap to relieve pressure.
- Drain the Coolant: Get underneath the vehicle and locate the petcock on the radiator. Place a catch bucket underneath and use a 19mm wrench to loosen the petcock, allowing the coolant to drain completely. Once drained, close the petcock.
Step 2: Remove Components
- Remove Splash Shield: Underneath the vehicle, remove the three push clips from the front splash shield and the five and a half millimeter bolts holding it in place.
- Disconnect Wiring: Locate the wiring harness connected to the radiator. Disengage the red lock tab and squeeze the tab to disconnect the wiring.
- Remove Air Filter Box: Loosen the clamp on the air filter box using an 8mm socket or flathead screwdriver. Remove the air filter and set it aside.
- Disconnect Fan Assembly: Remove the wiring from the fan assembly by squeezing the tab and pulling it away.
- Remove Hoses: Follow the hoses to the radiator and remove the clamps to disconnect them.
Step 3: Access the Radiator
- Remove Fan Shroud Bolts: Locate and remove the eight millimeter bolts securing the fan shroud.
- Remove Engine Cover: Take off the engine cover by removing the bolts that hold it down.
- Disconnect Bumper Cover: Disconnect the lights inside the bumper cover and remove the bolts along the wheel well. Carefully pull away the bumper cover.
Step 4: Remove the Old Radiator
- Remove Bracket Bolts: Remove the ten millimeter bolts holding the brackets on both sides of the radiator.
- Lift the Radiator: Carefully lift the radiator and condenser out of their mounts. Ensure you are not damaging any components during this process.
- Remove AC Line Clip: Detach the AC line clip from the old radiator.
Step 5: Install the New Radiator
- Position the New Radiator: Place the new radiator into position, ensuring it aligns with the condenser.
- Secure the Radiator: Install the bolts to secure the radiator in place, ensuring they are tightened properly.
- Reconnect Hoses: Reattach the upper and lower hoses to the radiator, ensuring the clamps are secure.
- Reinstall Fan Shroud: Position the fan shroud back into place and secure it with the bolts.
Step 6: Reassemble Components
- Reinstall Air Filter Box: Place the lower portion of the air filter box back in position and secure it with bolts.
- Reconnect Wiring: Reconnect the wiring harness to the fan assembly and ensure all connections are secure.
- Reattach Bumper Cover: Carefully lift the bumper cover back into place and secure it with the bolts removed earlier.
- Replace Engine Cover: Reinstall the engine cover and tighten the bolts.
Step 7: Fill the Cooling System
- Fill Coolant: Use a vacuum tool to fill the cooling system with manufacturer-specified coolant. Monitor the level to ensure it reaches the appropriate mark.
- Check for Leaks: After filling, start the vehicle and let it run while monitoring the coolant level and temperature gauge. Ensure the cooling fans activate as expected.
Conclusion
Replacing the radiator in a 2007-2014 Ford Edge is a manageable task with the right approach. By following these detailed steps, you can ensure a successful installation and maintain the performance of your vehicle. Always remember to dispose of old coolant responsibly and check for any leaks after the installation is complete.