This comprehensive guide walks you through the process of making sourdough bread from scratch, detailing each step from preparing the starter to baking the perfect loaf, with tips and tricks for success along the way.
Sourdough bread has gained immense popularity for its unique flavor and texture. In this guide, we will walk you through the entire process of making sourdough bread from scratch, ensuring that even beginners can achieve delicious results.
Before diving into the baking process, it's essential to prepare your sourdough starter. In this case, we are using a starter affectionately named "Dixie."
After five months of inactivity, it's time to wake up Dixie. Start by mixing 1000 grams of flour with 750 grams of filtered water in a glass or wooden bowl. Avoid metal bowls as they can interfere with the fermentation process.
Using a kitchen scale is crucial for accurate measurements. Ensure your scale does not time out during use, as this can lead to frustration.
Combine the flour and water until you achieve a shaggy consistency. This mixture should not be stretchy at this point. Cover the bowl with a disposable shower cap or plastic wrap and let it sit for about an hour.
After an hour, check on your starter. It should have doubled in size and have a slightly domed top. This indicates that fermentation is taking place.
At this stage, you will want to incorporate 220 grams of your starter back into the mixture. This process is known as building strength. You can choose to feed your starter and store it in the fridge if you plan to bake later, or leave it out if you're ready to bake now.
The next step is bulk fermentation, where your starter will feast on the flour and water mixture. This process is essential for developing flavor and texture.
Every 10 minutes for the next hour, perform a stretch and fold technique. Wet your hands and grab the dough, stretching it and folding it over itself. Repeat this process for about 10 minutes.
After the initial stretch and folds, cover the dough and let it rest in a warm place for another hour. You will repeat the stretch and fold process several times, depending on the warmth of your environment.
Once your dough has risen and is bubbly, it’s time to shape it. Dust your work surface with flour and gently turn out the dough. Fold each corner over itself to create tension in the dough.
After shaping, cover the loaves with a damp towel and let them rest for 10 minutes. Then, perform another shaping and place them in a warm spot to proof.
To check if your dough is ready, perform the poke test. If the dough springs back slowly, it’s ready for the fridge. Let it chill in the fridge for at least overnight, up to 48 hours for a more pronounced sour flavor.
The next morning, preheat your oven to 500°F with your Dutch oven inside. This step is crucial for achieving a crispy crust.
Dust the top of your loaves with flour and score them with a sharp blade. This allows for proper expansion during baking.
Carefully place the loaves into the preheated Dutch oven and bake for 20 minutes at 500°F. After that, reduce the temperature to 450°F and bake for an additional 25 to 30 minutes, depending on your desired crustiness.
Once baked, allow the loaves to cool completely before slicing. This step is essential for maintaining the bread's texture and moisture.
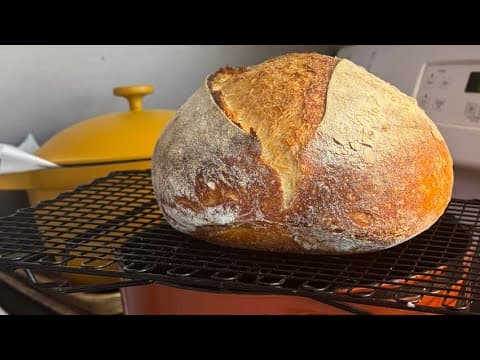
After all the hard work, you will have two beautiful loaves of sourdough bread. The moistness and flavor of homemade sourdough are unmatched, making every step worth it.
Making sourdough bread from scratch can be a rewarding experience. With patience and practice, anyone can master the art of sourdough baking. Enjoy your freshly baked bread and the satisfaction that comes with creating something delicious from scratch!