In this extensive 7-hour course on reverb, you will learn everything you need to know about using reverb effectively in your music production. From the fundamentals to advanced techniques, this guide will help you achieve a mix that sounds wide, deep, and three-dimensional.
Understanding Reverb
What is Reverb?
Reverb is essentially the sound of a room. It is created when sound waves bounce off surfaces and return to our ears after a short delay. This phenomenon gives a sense of space and depth to audio recordings. In mixing, reverb is used to recreate this effect, allowing instruments to sound as if they are in a specific environment.
The Importance of Reverb in Mixing
Reverb serves two main purposes in mixing:
- Creating Space: It glues tracks together, making the mix feel cohesive and adding depth and width.
- Creating Style: It enhances the uniqueness of certain instruments, adding intrigue and energy to the mix.
The Fundamentals of Reverb
Key Parameters of Reverb
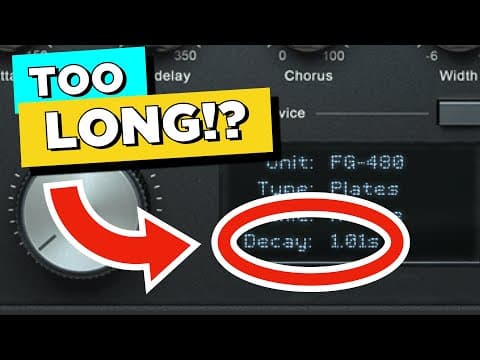
- Decay Time: The time it takes for the reverb to fade away. Longer decay times create a more spacious sound, while shorter decay times keep the mix tight.
- Room Size: Determines how large or small the simulated space feels.
- Pre-Delay: The time between the direct sound and the onset of reverb. This can help push the reverb back in the mix.
- Damping: Controls how high frequencies are absorbed over time, affecting the tonal quality of the reverb.
- Density: Refers to how thick or thin the reverb sounds, influencing the overall texture of the mix.
The Shadow System
The Shadow System is a methodology for applying reverb in a mix, focusing on three key aspects:
- Creating Depth: Using early reflections to give a sense of space.
- Creating Distance: Utilizing pre-delay and EQ to push sounds back in the mix.
- Creating Direction: Employing panning techniques to place sounds in a stereo field.
Advanced Reverb Techniques
Using Reverb on Vocals
When applying reverb to vocals, consider the following:
- Avoid Long Decay Times: Long decay can muddy the clarity of the vocals.
- Use Pre-Delay: A short pre-delay can help keep the vocals upfront while still adding depth.
- Damping and EQ: Use EQ to cut unwanted frequencies and damping to control the tonal quality of the reverb.
Reverb on Drums
For drums, especially snare drums, keep these tips in mind:
- Shorter Decay Times: Drums typically require shorter decay times to maintain punchiness.
- Avoid Overly Bright Reverbs: Bright reverbs can clash with the natural sound of drums.
- Use Noise Gates: To clean up the sound and prevent unwanted bleed from other instruments.
Reverb on Electric Guitars
Electric guitars often benefit from:
- Spring Reverb: A classic choice that adds character without overwhelming the mix.
- Dual Mono Reverb: This technique allows for creative panning and can enhance the stereo image of the guitar.
Practical Applications
Setting Up Your Reverb
- Choose the Right Type: Depending on the instrument, select a room, chamber, or plate reverb.
- Adjust Key Parameters: Set decay time, pre-delay, and damping according to the needs of the mix.
- Use Sends for Reverb: Create a send for reverb to maintain control over the mix.
- Automate Sends for Throws: Use automation to create dynamic reverb effects on specific words or phrases.
Mixing Techniques
- Use EQ to Shape Reverb: Cut low and high frequencies to prevent mix gunk.
- Sidechain Compression: Use sidechain techniques to keep vocals clear while allowing reverb to fill space.
- Experiment with Modulation: Adding modulation to reverb can create interesting textures and depth.
Conclusion
By mastering the use of reverb in your mixes, you can create a sound that is not only professional but also uniquely yours. Remember to experiment with different settings and techniques to find what works best for your music. With practice, you'll be able to achieve mixes that are rich in depth and style, making your tracks stand out in any genre.