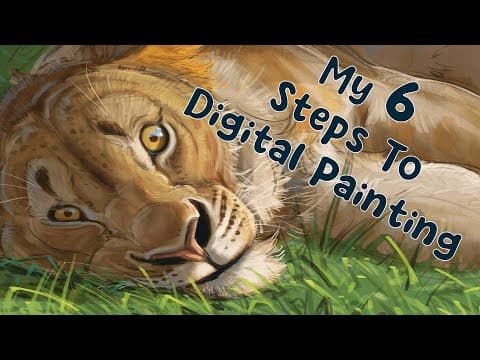
This blog post outlines a comprehensive six-step process for digital painting, applicable across various software. It covers everything from initial rough sketches to final refinements, emphasizing the importance of layers, local colors, shadows, and highlights.
Digital painting has become an increasingly popular medium for artists, thanks to its versatility and the powerful tools available in various software. In this post, we will explore a six-step process for digital painting that can be applied across different platforms, including Photoshop, Krita, and Procreate. Whether you are a beginner or an experienced artist, these steps will help you create stunning digital artwork.
The first step in the digital painting process is to create a rough drawing. This is where you establish your composition and layout. Using a new layer, sketch out your ideas freely. For this example, we will be drawing a lion cub, focusing on capturing the squishiness of its face. The rough sketch serves as a foundation for your illustration, allowing you to explore different elements before refining them.
Once you have your rough sketch, the next step is to refine it. Lower the opacity of your rough sketch layer and create a new layer for your refined sketch. This is where you tighten up your drawing, ensuring that the proportions and details are accurate. A useful technique is to flip your drawing horizontally, which can help you spot any mistakes that may not be obvious in the original orientation.
After finalizing your refined sketch, it’s time to add local colors. Create a new layer beneath your sketch layers for this purpose. Local color refers to the inherent color of an object without any lighting effects. For our lion cub, we will use various shades of ocher and brown to represent its fur. At this stage, focus on laying down the base colors without worrying about shadows or highlights. This will provide a solid foundation for the next steps.
With the local colors in place, the next step is to add shadows. Create a new layer above your local color layer and set its blend mode to multiply. This allows you to apply shadow colors that will blend with the colors beneath. For our lion cub, we will use warm shadow colors to maintain the overall warmth of the painting. Think about where the light source is coming from and apply shadows accordingly, enhancing the depth and dimension of your artwork.
Following the shadows, create another layer on top and set its blend mode to overlay. This layer will be used for highlights. Choose a lighter color that complements your local colors and begin painting in the areas where light hits the subject. This step is crucial for bringing your painting to life, as it adds contrast and helps define the form of the lion cub.
The final step is all about refinement. Create a new layer on top of all previous layers for this purpose. Here, you will add finer details, adjust colors, and enhance textures. Experiment with cooler colors in the shadow areas and brighter highlights to create a balanced composition. This is also the time to add any final touches, such as whiskers or additional textures in the grass, to complete your painting.
By following these six steps—rough drawing, refined sketch, local color, shadows, highlights, and refinement—you can create compelling digital paintings regardless of the software you use. Each step builds upon the last, allowing you to develop your artwork in a structured manner. Remember, practice is key, so don’t hesitate to experiment and find your unique style. Happy painting!