
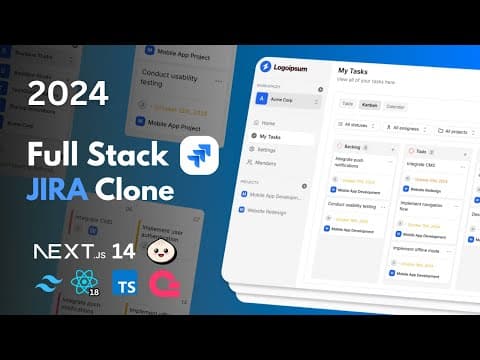
This blog post details the process of building a Jira clone using Next.js, focusing on creating workspaces, managing members, and implementing a user-friendly interface. It covers setting up the necessary API routes, handling user authentication, and ensuring proper data management with a focus on user experience.
In this blog post, we will explore how to build a fully functional Jira clone using modern web technologies, specifically focusing on creating workspaces and managing members. This project is ideal for developers looking to enhance their skills in building complex web applications and understanding project management tools.
Throughout this project, we will utilize Next.js, React, Tailwind CSS, and Hono.js to create our Jira clone. We will implement various features typical of a professional project management platform, including:
Before diving into the workspace and member management features, ensure you have the following technologies installed:
To set up the project, run the following command in your terminal:
npx create-next-app jira-clone
After the project is created, navigate to the project directory and install the necessary dependencies:
cd jira-clone
npm install tailwindcss hono
First, we need to define the schema for our workspaces. This will include attributes such as the workspace name and an optional image URL. Create a new file called schemas.js in the features/workspaces directory:
import { z } from 'zod';

export const createWorkspaceSchema = z.object({
  name: z.string().min(1, "Workspace name is required"),
  image: z.string().optional(),
});
Next, we will create an API route to handle workspace creation. In the features/workspaces/server directory, create a file called route.js:
import { createWorkspaceSchema } from './schemas';
import { z } from 'zod';

const app = new Hono();

app.post('/workspaces', async (c) => {
  const { name, image } = await c.req.json();
  const validation = createWorkspaceSchema.safeParse({ name, image });

  if (!validation.success) {
    return c.json({ error: validation.error.errors }, 400);
  }

  // Logic to save workspace to the database
  return c.json({ message: 'Workspace created successfully' });
});

export default app;
Now, let's create a form for users to create new workspaces. In the features/workspaces/components directory, create a file called CreateWorkspaceForm.js:
import React from 'react';
import { useForm } from 'react-hook-form';
import { createWorkspaceSchema } from '../schemas';

const CreateWorkspaceForm = () => {
  const { register, handleSubmit, formState: { errors } } = useForm();

  const onSubmit = async (data) => {
    // Call API to create workspace
  };

  return (
    <form onSubmit={handleSubmit(onSubmit)}>
      <input {...register('name', { required: true })} placeholder="Workspace Name" />
      {errors.name && <span>This field is required</span>}
      <button type="submit">Create Workspace</button>
    </form>
  );
};

export default CreateWorkspaceForm;
Finally, we need to integrate the CreateWorkspaceForm into our dashboard layout. In the app/dashboard/page.js, import and render the form:
import CreateWorkspaceForm from '../features/workspaces/components/CreateWorkspaceForm';

const DashboardPage = () => {
  return (
    <div>
      <h1>Dashboard</h1>
      <CreateWorkspaceForm />
    </div>
  );
};

export default DashboardPage;
Next, we will define the schema for our members. In the features/members/schemas.js file, create the following:
import { z } from 'zod';

export const memberSchema = z.object({
  userId: z.string().min(1, "User ID is required"),
  workspaceId: z.string().min(1, "Workspace ID is required"),
  role: z.enum(['admin', 'member']),
});
In the features/members/server directory, create a file called route.js:
import { memberSchema } from './schemas';

const app = new Hono();

app.post('/members', async (c) => {
  const { userId, workspaceId, role } = await c.req.json();
  const validation = memberSchema.safeParse({ userId, workspaceId, role });

  if (!validation.success) {
    return c.json({ error: validation.error.errors }, 400);
  }

  // Logic to save member to the database
  return c.json({ message: 'Member added successfully' });
});

export default app;
Create a new component for managing members in the features/members/components directory called ManageMembers.js:
import React from 'react';

const ManageMembers = () => {
  return (
    <div>
      <h2>Manage Members</h2>
      {/* Logic to display and manage members */}
    </div>
  );
};

export default ManageMembers;
Finally, integrate the ManageMembers component into the dashboard layout:
import ManageMembers from '../features/members/components/ManageMembers';

const DashboardPage = () => {
  return (
    <div>
      <h1>Dashboard</h1>
      <CreateWorkspaceForm />
      <ManageMembers />
    </div>
  );
};

export default DashboardPage;
In this blog post, we have successfully built a Jira clone using Next.js, focusing on creating workspaces and managing members. We implemented various features, including user authentication, workspace creation, and member management. This project serves as a great example of how to build complex web applications using modern web technologies.
Feel free to explore further enhancements, such as integrating third-party authentication or adding more advanced project management features. Happy coding!



















