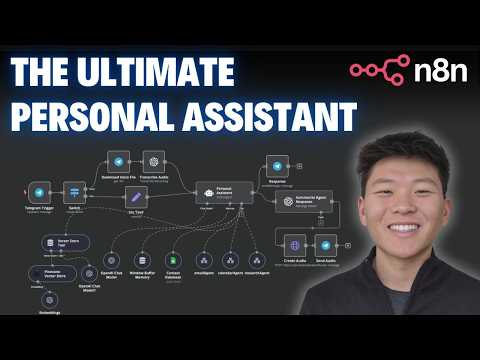
Creating a personal assistant AI agent can significantly enhance productivity by automating tasks such as scheduling meetings, sending emails, and retrieving information. In this guide, we will walk through the process of building a personal assistant AI agent using n8n, a powerful workflow automation tool that requires no coding skills.
Overview of the Personal Assistant AI Agent
The personal assistant AI agent we will build can perform the following tasks:
- Create calendar events
- Send confirmation emails
- Retrieve calendar events
- Respond to user queries via Telegram
- Handle voice commands and provide audio responses
Step 1: Setting Up the Workflow
To start, we will create a new workflow in n8n. This workflow will serve as the foundation for our personal assistant.
- Create a New Workflow: Open n8n and create a new workflow.
- Add a Trigger: We will use a Telegram trigger to initiate the workflow whenever a message is received.
- Configure the Trigger: Set the trigger to activate on message received.
Step 2: Integrating the AI Agent
Next, we will integrate an AI agent that will process the commands sent via Telegram.
- Add an AI Agent: Drag an AI agent node into the workflow. This agent will interpret user commands.
- Set Up Memory: To maintain context, we will add a memory node that stores previous messages.
- Configure Session ID: Ensure the session ID is set correctly to track conversations.
To enable the assistant to perform various tasks, we will integrate several tools:
- Add Google Sheets Tool: This will serve as our contact database.
- Connect Your Account: Link your Google account and select the appropriate sheet containing contact information.
- Test the Integration: Ensure the assistant can retrieve email addresses from the sheet.
3.2 Email Agent
- Create a New Workflow for Email: This workflow will handle email-related tasks.
- Add an AI Agent: Similar to the previous step, add an AI agent for processing email commands.
- Integrate Gmail Tool: Set up actions for sending emails, retrieving emails, and managing inbox tasks.
- Test Email Functionality: Ensure the assistant can send and retrieve emails correctly.
3.3 Calendar Agent
- Create a New Workflow for Calendar: This will manage calendar events.
- Add Calendar Tool: Integrate a calendar tool to create and retrieve events.
- Configure Event Creation: Set parameters for start time, end time, and attendees.
- Test Calendar Functionality: Verify that the assistant can create and retrieve calendar events.
Step 4: Voice Command Integration
To enhance user interaction, we will enable voice command capabilities:
- Add Voice Recognition: Integrate a node that listens for voice commands.
- Transcribe Audio: Use an audio transcription service to convert voice commands into text.
- Respond with Audio: Set up the assistant to respond with audio files using a text-to-speech service.
Step 5: Testing the Personal Assistant
Once all components are integrated, it’s time to test the personal assistant:
- Send Commands via Telegram: Test various commands such as scheduling meetings, sending emails, and retrieving calendar events.
- Check Responses: Ensure the assistant responds accurately and promptly.
- Voice Commands: Test the voice command functionality to verify that it can handle spoken requests.
Conclusion
Building a personal assistant AI agent in n8n is a powerful way to automate daily tasks and improve productivity. By integrating various tools and functionalities, you can create a robust assistant that can handle a wide range of tasks. This guide provides a comprehensive overview of the steps involved, allowing you to customize and expand your personal assistant as needed.
Feel free to explore additional features and tools within n8n to further enhance your personal assistant's capabilities. Happy automating!