
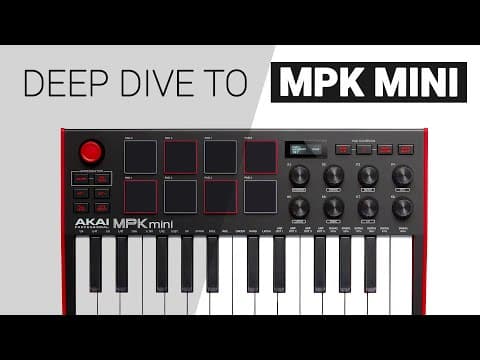
This guide provides an in-depth look at the AKAI MPK Mini Mark II, covering its features, configuration options, and how to optimize its use for music production. It includes detailed instructions on adjusting velocity sensitivity, using pads and knobs, and utilizing the companion app for enhanced functionality.
Welcome back to a new video on this channel! In this post, we will take a deep dive into the AKAI MPK Mini Mark II. This is not just a review; it is a complete guide about this device. The guide is organized into chapters, allowing you to jump to specific sections as needed.
As soon as you get the MPK Mini out of the box, you may notice a velocity sensitivity issue. This is not a malfunction; it is simply how the device is designed to work. The keys are quite sensitive, and you may need to play harder to achieve the desired velocity. To configure the device, turn off the full level and press and hold the configuration button for about 10 seconds. This will bring up the configuration screen.
On the configuration screen, you will see options labeled V1, V2, V3, V4, and a black balance setting. The default values are set for the controller, but you can adjust these to suit your playing style. If you want to make the keys less sensitive, you can lower the values. For example, setting the values in the 40s can help you achieve a more manageable sensitivity. Once you have made your adjustments, double-check by playing the keys to ensure they respond as desired.
The black balance setting adjusts the sensitivity of the black keys relative to the white keys. A setting of 1.0 means equal sensitivity, while lowering it to 0.5 makes the black keys less sensitive. Adjust this setting based on your playing preferences.
The octave control allows you to shift the pitch range up or down. Pressing both octave buttons simultaneously resets the octave back to the center.
The X and Y joystick controls are used for pitch bend and modulation. Moving the joystick horizontally affects the pitch (X-axis), while vertical movement affects modulation (Y-axis). You can also configure these controls using the companion app.
The pads on the MPK Mini are one of its standout features. They are sensitive and respond to aftertouch. The full level and note repeat functions are specifically designed for the pads. When you activate full level, the velocity will be set to 127 regardless of how hard you hit the pad. Note repeat allows you to create rhythmic patterns tied to the tempo.
Each pad sends MIDI note data by default on channel 10. You can change this setting using the companion app. Additionally, the MPK Mini has 16 pads available, with 8 on bank A and 8 on bank B. You can switch between banks by pressing the bank button.
The pads can also send CC values. When you enable CC mode, pressing a pad will display the CC value being sent. This allows for extensive mapping options within your DAW.
The program select button allows you to load different configurations for various DAWs. By holding the button and selecting a pad, you can load specific programs tailored for software like GarageBand or FL Studio. You can also create custom scales and configurations using the companion app.
The arpeggiator can be activated by holding the on/off button. It offers various settings, including BPM, time division, and swing. You can also sync the arpeggiator to external devices using the sync knob.
The arpeggiator has several modes, including up, down, exclude, include, and random. You can also adjust the octave range for the arpeggiator, allowing for creative musical patterns.
The knobs on the MPK Mini can be assigned to send CC data. By default, they operate in absolute mode, meaning they will jump to a specific value when turned. You can change this to relative mode using the companion app, which allows for smoother transitions in values.
The companion app significantly expands the functionality of the MPK Mini. It allows you to create and customize programs, monitor MIDI data, and send configurations to the device. You can also use the app to set up scales, CC ranges, and more.
In the companion app, you can create specific programs and send them to the MPK Mini. You can also save your configurations for future use. The app allows for detailed customization, including adjusting pad sensitivity and key channels.
The AKAI MPK Mini Mark II is a powerful MIDI controller that offers extensive features for music production. By understanding its configuration options and utilizing the companion app, you can take full advantage of this device in your music-making process. If you found this guide helpful, please consider liking and subscribing to support the channel.



















