
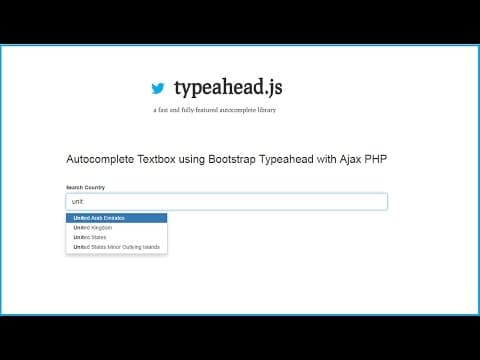
This tutorial explains how to create an autocomplete textbox using the Typeahead plugin with Ajax, PHP, and Bootstrap. It covers setting up the database, writing the necessary PHP code, and integrating the Typeahead plugin to provide suggestions based on user input.
In this tutorial, we will learn how to create an autocomplete textbox using the Typeahead JavaScript plugin along with Ajax, PHP, and Bootstrap. Autocomplete features are essential for enhancing user experience by providing suggestions as users type in a textbox. This tutorial builds on previous discussions about autocomplete textboxes using PHP and Ajax.
We will utilize the Typeahead plugin to build an autocomplete textbox with minimal code. The plugin requires one or more datasets to generate suggestions based on user input. We will be using a database containing country data to demonstrate this functionality.
We will start with a testing database that includes a table named countries. This table has four columns: id, short_name, name, and phone_code. We will insert data for various countries into this table, which will be used to populate the autocomplete suggestions.
On our index page, we will include the necessary links for jQuery, the Typeahead plugin, and Bootstrap stylesheets. The first step is to create a textbox for entering the country name. Here’s how we can set it up:
<input type="text" name="country" class="form-control" autocomplete="off">
Next, we will activate the Typeahead plugin on this textbox. We will write the following JavaScript code to handle the autocomplete functionality:
$('#country').typeahead({
    source: function(query, result) {
        $.ajax({
            url: "fetch.php",
            method: "POST",
            data: { query: query },
            dataType: "json",
            success: function(data) {
                result($.map(data, function(item) {
                    return item;
                }));
            }
        });
    }
});
In this code, we define a source function that sends an Ajax request to fetch.php whenever the user types in the textbox. The server responds with a JSON array of country names that match the query.
Now, we will create the fetch.php file to handle the Ajax request. The first step is to establish a connection to the database:
$connection = mysqli_connect("localhost", "root", "", "testing");
Next, we will retrieve the query from the textbox and sanitize it:
$request = mysqli_real_escape_string($connection, $_POST['query']);
We will then write a SQL query to search for country names that match the user input:
$query = "SELECT * FROM countries WHERE name LIKE '%$request%'";
After executing the query, we will store the results in an array:
$result = mysqli_query($connection, $query);
$data = array();
while ($row = mysqli_fetch_assoc($result)) {
    $data[] = $row['name'];
}
Finally, we will return the data in JSON format:
echo json_encode($data);
After saving the code, we can test the autocomplete textbox in the browser. When the page loads, we should see a textbox where we can start typing a country name. For example, typing "United" will display a list of countries starting with that name, such as "United States of America". Clicking on a suggestion will fill the textbox with the selected country name and hide the suggestion list.
In this tutorial, we successfully created a simple autocomplete textbox using the Typeahead plugin with Ajax, PHP, and Bootstrap. This approach allows us to implement autocomplete functionality with minimal code while providing a smooth user experience. The Typeahead plugin also offers various advanced features, which can be explored further in its official documentation.
If you have any questions regarding this tutorial, feel free to leave a comment. If you found this tutorial helpful, please share it with your friends or on social media. For more updates on future tutorials, consider subscribing to our YouTube channel. Thank you for watching, and we look forward to seeing you in the next video!



















