
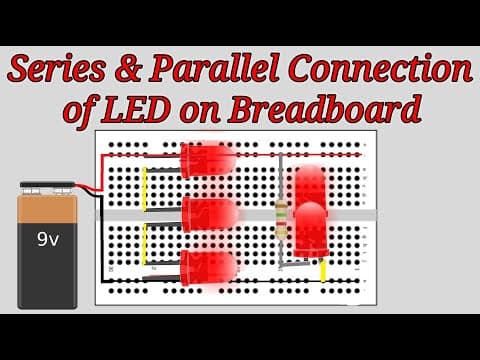
This blog post explores the concepts of series and parallel connections of LEDs on a breadboard, detailing the advantages and disadvantages of each method, along with practical applications and tips for successful implementation.
When working with LEDs (Light Emitting Diodes), understanding how to connect them properly is crucial for any electronics project. This blog post will delve into the two primary methods of connecting LEDs: series and parallel connections. We will explore the advantages and disadvantages of each method, practical applications, and tips for successful implementation on a breadboard.
A breadboard is a reusable platform used for prototyping electronic circuits. It allows you to easily connect components without soldering, making it ideal for testing and experimenting with different circuit designs.
In a series connection, LEDs are connected end-to-end, forming a single path for current to flow. Here are some key points about series connections:
Series connections are often used in applications where uniform brightness is essential, such as in decorative lighting or LED strips.
In a parallel connection, each LED is connected to the same voltage source, allowing current to flow through multiple paths. Here are some key points about parallel connections:
Parallel connections are commonly used in applications where reliability is critical, such as in automotive lighting or emergency lighting systems.
Understanding the differences between series and parallel connections of LEDs is essential for anyone looking to work with electronics. Each method has its own set of advantages and disadvantages, making them suitable for different applications. By following the tips provided, you can successfully implement LED connections on a breadboard, enhancing your projects and gaining valuable hands-on experience in electronics.



















