This blog post provides a detailed overview of basic animation techniques in 3ds Max, focusing on keyframes, animation modes, and the Curve Editor. It covers how to set frame rates, use Auto Key and Set Key modes, and animate objects effectively, ensuring smooth motion and control over animations.
Animation is a fascinating art form that brings still images to life, creating the illusion of motion. In this blog post, we will explore the fundamentals of basic animation in 3ds Max, a powerful 3D modeling and animation software. We will cover key concepts such as keyframes, animation modes, and the Curve Editor, providing you with the tools to create smooth and engaging animations.
Animation is essentially a series of still images displayed in quick succession, allowing viewers to perceive motion. In traditional animation, artists create keyframes—two main images that define the start and end of a movement. For example, to animate a character's hand moving above its head, an artist would draw one keyframe with the hand down and another with the hand raised. The in-between images, known as in-betweens, are then created to smooth out the motion.
In 3D applications like 3ds Max, you set keyframes to record the state of an object in the scene. The software then interpolates the in-between frames, allowing for fluid animations. Most animations focus on transforming objects through movement, rotation, and scaling, but you can also animate other properties, such as material colors or light brightness.
To begin animating in 3ds Max, open the Animation_Start.max file. Before diving into animation, it's essential to understand frame rates. Frame rates determine how many frames are displayed per second, affecting the smoothness of your animation. By default, 3ds Max is set to NTSC at 30 frames per second (fps). You can adjust the frame rate at any time, and the software will adapt existing animations accordingly, provided you enable the Adjust Keys option.
In the Time Configuration settings, you can define your desired output frame rate and set the time range for your animation. This includes specifying the Start Time and End Time, which can also be adjusted later. The Playback section allows you to set the playback speed of your animation, typically left at 1x speed for standard playback.
3ds Max offers two primary animation modes: Auto Key and Set Key.
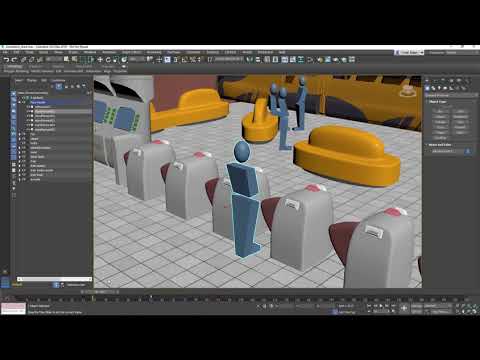
To start animating, select the object you want to animate, such as standPerson001, and press W to activate the Move tool. Turn on Auto Key by clicking its button; the interface will turn red, indicating that you are in Animate mode.
The Timeline allows you to navigate through different frames and scrub through the animation. For instance, if you move to frame 30 (representing 1 second of animation) and move the standPerson001 object toward a barricade, Auto Key will record this change, creating keyframes at frames 0 and 30 to mark the start and end of the movement.
If you want the standPerson001 to remain stationary between frames 30 and 60, you can copy the keyframe by Shift-dragging it to frame 60. This will ensure that the object stays in place during that interval.
After animating the movement of standPerson001, you can animate the barricade using the Set Key mode. This mode is more manual and allows for pose-to-pose animation. When you activate Set Key, the interface will also turn red, but it will not create keyframes automatically. Instead, you must manually set keyframes at specific frames.
To animate the barricade, select a frame (e.g., frame 40) and click the Set Key button or press K to record its state. For example, at frame 60, you can rotate the barricade 30 degrees to open it, then set another keyframe at frame 75 to keep it open for a moment. Finally, at frame 90, you can rotate the barricade back to its closed position and set a keyframe.
After creating your initial animation, you may notice that the movement of standPerson001 includes unwanted acceleration and deceleration. To refine this, you can use the Curve Editor.
With the standPerson001 object selected, open the mini Curve Editor. Here, you can filter the view to focus on specific transformation tracks, such as Position X, Y, and Z. The animation curves represent the object's movement over time, showing how it accelerates and decelerates.
In the Curve Editor, you can adjust the interpolation of keyframes to achieve a more natural motion. For instance, selecting the first keyframe allows you to modify its Bezier tangent handle or apply Key Tangent presets like Fast or Slow. By setting the tangent to Linear, you can ensure that the object moves at a constant speed until it decelerates near the barricade.
In this lesson, we have covered the basics of animation in 3ds Max, including the use of keyframes, the Auto Key and Set Key modes, and how to refine animations using the Curve Editor. By understanding these fundamental concepts, you can create engaging animations that bring your 3D scenes to life. Remember to save your progress, as we will continue building on this foundation in the next lesson.