Installing window treatments can be a daunting task for many homeowners, especially when attempting to do it yourself. In this guide, we will explore three common mistakes that DIYers often make when hanging blinds and shades, along with practical solutions to help you achieve a successful installation.
Homeowners often face high costs when hiring professionals to install blinds and shades. However, with the right knowledge and tools, you can save both time and money by doing it yourself. This post will help you navigate the installation process and avoid common pitfalls.
Mistake #1: Getting the Wrong Size
One of the most frustrating mistakes is selecting the incorrect size for your blinds or shades. To avoid this, follow these guidelines:
Measuring Length
- Common lengths for blinds are 72 inches, 64 inches, and 48 inches. Measure your window opening carefully. For example, if your window height is approximately 70 and 3/4 inches, opt for the 72-inch length.
- For shorter windows, such as those in kitchens or bathrooms, the 48-inch length may be more appropriate.
Measuring Width
- Width measurement can be more complex, depending on whether you choose an inside or outside mount.
- Inside Mount: Measure the width of your window opening at the top, middle, and bottom, and use the smallest measurement. Subtract 1/4 inch from each side (or 1/2 inch total) to ensure a proper fit. For a 33-inch opening, select blinds that are 32 1/2 inches wide.
- Outside Mount: Measure the window opening and add 3 inches to ensure adequate coverage and privacy. This will provide an inch and a half overhang on each side, which helps block light and enhance privacy.
Important Note
- When purchasing blinds, check the packaging closely. Sometimes, the labeled size may not reflect the actual width after accounting for the necessary adjustments.
Mistake #2: Using Inadequate Screws
The screws that come with blinds and shades are often of poor quality, which can lead to frustrating installation experiences. Here’s how to improve your screw selection:
Upgrade Your Screws
- The standard screws are typically Philips head screws made of soft metal, which can strip easily and fail to hold securely. Instead, consider using:
- Spax Screws: These have a number two square drive, providing a better grip and making installation easier.
- Easy Anchors: If you need drywall anchors for outside mounts, these are a reliable option.
- Torque Bits: Use a T15 torque bit for better engagement with the screws.
Pre-Start Your Screws
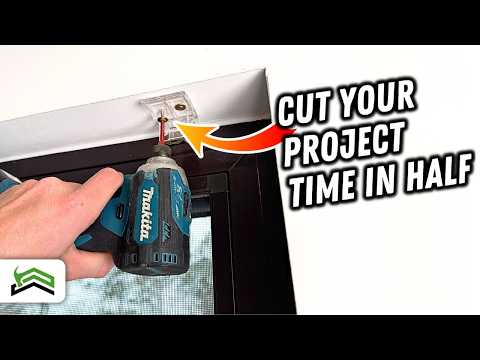
- Before mounting the brackets, start your screws in the brackets. This technique allows for easier alignment and provides an extra set of hands during installation.
Mistake #3: Improperly Mounting Brackets
Mounting brackets correctly is crucial for a successful installation. Here are some tips to ensure proper bracket placement:
Choosing the Right Bracket
- Select a mounting bracket that suits your blinds. A spring-loaded front lip bracket can simplify the installation process.
Marking Your Measurements
- Use a small combo square to mark where the brackets will be mounted. This ensures that the brackets are straight and aligned properly.
- Transfer the marks from the combo square to the wall, ensuring that your brackets are positioned accurately.
Securing the Brackets
- Once you have marked the positions, drill pilot holes if necessary, and secure the brackets in place. This will make it easier to attach the headrail without any issues.
Conclusion
By avoiding these three common mistakes—selecting the wrong size, using inadequate screws, and improperly mounting brackets—you can ensure a smoother installation process for your blinds and shades. With careful measurements and the right tools, you can achieve a professional-looking result without the high costs associated with hiring a professional.
Let us know in the comments which type of blinds you prefer and if you have any other tips for DIY installations!