Installing a toilet may seem like a straightforward task, but according to experts, 90% of toilets are installed incorrectly during remodels and renovations. This blog post will guide you through the proper steps to install a toilet successfully, ensuring you avoid common pitfalls that can lead to leaks and other issues.
Preparing for the Installation
Before you begin the installation process, it’s essential to prepare adequately. Here are the initial steps:
- Shocking the System: Before turning off the water supply, pour a bucket of water into the toilet bowl. This creates a vacuum effect that helps remove excess water from the system.
- Removing Water: Use a shop vacuum to remove any remaining water from the tank and bowl. This step is crucial to prevent spills when you lift the toilet.
- Disconnecting the Toilet: Once the water is removed, you can disconnect the toilet from the floor. Use a flathead screwdriver to remove the nuts holding the toilet in place. Remember that these nuts are under compression, so they should come off easily.
Removing the Old Toilet
With the toilet disconnected, it’s time to remove it:
- Lifting the Toilet: Carefully lift the toilet off the flange. Be cautious of any remaining water that may spill out. If the toilet is stuck due to wax, gently wiggle it to break the seal.
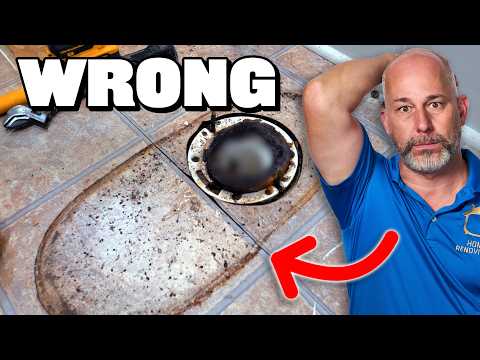
- Inspecting the Flange: Check the toilet flange for damage. It should be level with the floor. If it’s too low, you may need to raise it using a replacement flange.
Understanding the Flange and Wax Ring
The toilet flange is a critical component that connects the toilet to the waste pipe. Here are some key points to remember:
- Flange Height: The flange should be flush with the finished floor or slightly higher. If it’s too low, it can lead to leaks.
- Wax Ring Quality: Use a high-quality wax ring for a proper seal. Cheaper options may not provide adequate sealing, leading to future problems.
Installing the New Toilet
Now that you’ve prepared the area, it’s time to install the new toilet:
- Setting the Flange: If necessary, install a new PVC twist and seal flange. This will help ensure a proper fit and seal.
- Positioning the Toilet: Carefully position the toilet over the flange, aligning the bolts with the holes in the base of the toilet. Lower it gently onto the wax ring.
- Securing the Toilet: Tighten the nuts onto the bolts to secure the toilet in place. Be careful not to overtighten, as this can crack the porcelain.
Connecting the Water Supply
After securing the toilet, connect the water supply:
- Attaching the Valve: Use the existing valve or replace it if it’s old. Ensure that the connection is tight to prevent leaks.
- Testing for Leaks: Turn the water supply back on and check for any leaks around the connections. If you notice any, tighten the fittings as necessary.
Final Touches
Once the toilet is installed and connected:
- Grouting: If your floor is uneven, consider using grout around the base of the toilet for added stability. This can help prevent rocking and ensure a solid installation.
- Cleaning Up: Clean the area around the toilet and ensure everything is tidy. A clean installation not only looks better but also helps in identifying any future issues.
Conclusion
Installing a toilet correctly is essential for preventing leaks and ensuring a long-lasting fixture. By following these steps and paying attention to details like flange height and wax ring quality, you can avoid the common mistakes that plague many DIY installations. Remember, a well-installed toilet will save you time, money, and headaches in the future.