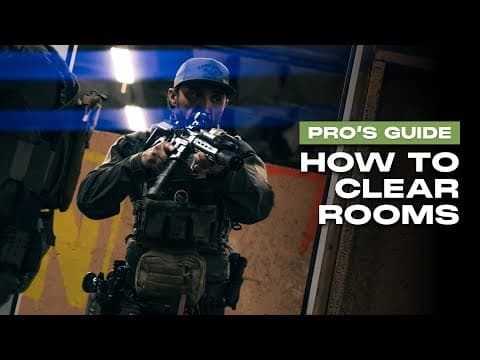
This blog post provides an in-depth guide on how to effectively clear center-fed and corner-fed rooms during Close Quarters Battle (CQB). It outlines the roles of team members during the approach, entry, and inside the structure, emphasizing the importance of communication, positioning, and tactical decision-making.
Welcome to the second episode of the Pro's Guide to Team Close Quarters Battle (CQB). In this post, we will explore the strategies for effectively taking down center-fed and corner-fed open door rooms. This guide will cover the three phases of operations: approach, entry, and actions inside the structure. Each team member has a specific role to play in these phases, ensuring a coordinated and efficient operation.
During the approach phase, the first team member (number one man) assumes the role of near-side or local security at the threshold of the open door. His primary responsibility is to secure the area immediately outside the door. The second team member (number two man) controls the stack and signals the number one man to enter by giving a squeeze and release on the shoulder or tricep.
Upon receiving the signal, the number one man enters the center-fed room, choosing the side that appears to be the greatest unknown to him. This decision is crucial as he takes the most risk by entering first. The number two man follows, entering the opposite side of the number one man. The number one man is responsible for clearing two corners to allow at least one assaulter to achieve depth into the room. If the number one man encounters resistance or has a longer distance to cover, the number two man can take the initiative to clear corners as well.
As the number one and two men clear their sectors of fire, the third and fourth team members (number three and four men) enter the room, dropping to the center and collapsing their sectors of fire to support the number one and two men. Their primary goal is to avoid clustering against the walls while ensuring they maintain a safe distance from the threshold.
Once inside, the number one man continues to clear corners and achieve depth, while the number two man supports him by monitoring his sector. The number three and four men remain relatively static, ensuring they do not impede the movement of the first two men. The number one man sets the pace for the entire stack, and all members must maintain tight spacing to avoid any gaps that could be exploited by threats.
When dealing with a corner-fed open door room, the approach becomes slightly easier. The number one man, after receiving the squeeze and release from the number two man, naturally achieves depth by moving along the near wall. The number two man again takes the opposite corner, ensuring that their sectors of fire interlock.
As they enter, the number three and four men drop center and collapse their sectors of fire to support the number one and two men. The key here is to maintain situational awareness and ensure that all angles are covered, especially in environments where threats may be hidden behind furniture or other obstructions.
Throughout the operation, it is crucial for team members to maintain situational awareness. The number one man has the unique advantage of being able to assess the room from a distance before fully committing to entry. This allows him to engage any visible threats before his muzzle crosses the threshold.
Effective communication is vital. The squeeze and release signal must be distinct to ensure that the number one man understands when to enter. Additionally, team members should continuously communicate their actions and observations to maintain coordination.
The number one man must be flexible and ready to adapt his plan based on what he observes upon entry. If he initially plans to go right but sees a threat on the left, he must be prepared to switch directions. The number two man must also be alert and ready to support the number one man as needed.
In conclusion, mastering the tactics for clearing center-fed and corner-fed rooms is essential for effective CQB operations. Each team member plays a critical role in ensuring safety and efficiency during the approach, entry, and actions inside the structure. By maintaining communication, situational awareness, and flexibility, teams can successfully navigate these high-stakes environments. Tune in for the next episode, where we will cover split stacks, priorities of work, exiting a room, and addressing opposing threats.